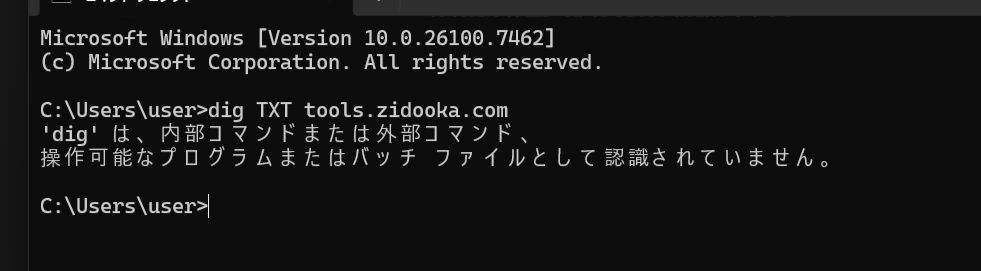
When verifying DNS records for server migration or Google Search Console ownership, many technical tutorials suggest using the dig command. However, if you try to run dig on a standard Windows environment (Command Prompt or PowerShell), you will likely encounter an error:
dig : The term 'dig' is not recognized as the name of a cmdlet, function, script file, or operable program.This is because dig is not installed by default on Windows. Instead, you should use the built-in nslookup command.
Basic Usage of nslookup
nslookup allows you to query DNS servers for IP addresses or specific DNS records.
Checking Specific Records (e.g., TXT)
To check a "TXT record" (often used for domain verification), you need to specify the record type.
One-liner example:
nslookup -type=TXT sub.example.com- -type=TXT: Specifies the record type (A, CNAME, MX, TXT, etc.).
- sub.example.com: The domain name you want to check.
Note for PowerShell Users: Sometimes PowerShell may not interpret arguments like -type=TXT correctly. In that case, try nslookup -q=TXT sub.example.com or use the interactive mode described below.
Using Interactive Mode (Recommended)
Type nslookup and press Enter to enter interactive mode.
Step 1: Start nslookup
nslookupStep 2: Set record type
set type=TXT(Use set type=A for A records, set type=CNAME for CNAME records)
Step 3: Enter domain
sub.example.comThe result will be displayed.
Step 4: Exit
exitUnderstanding the Output
If successful, you will see output similar to this:
Server:  UnKnown
Address:  192.168.1.1

Non-authoritative answer:
sub.example.com text =

        "google-site-verification=xxxxxxxxxxxxxxxx"
The text following text = is the value currently returned by the DNS server. If your configured value appears here, DNS propagation is complete.
Summary
If you can't find the dig command on Windows, simply use nslookup. Remember to use set type=TXT (or -type=TXT) when checking verification records.
